Auth0 + Spring Boot: Social login with custom authentication provider [LinkedIn, Github, StackOverflow]
Hello everyone,
This is going to be my first tech blog on the internet and I just about discovered the Auth0 hackathon to go through with it. Although it's not going to be an extensive one as I had only a couple of days to work on it I still found myself spending considerable time on getting it to work hence writing this up.
Repo : https://github.com/Vivek-Dh/Auth0-SpringBoot-multiple-social-login
What I wanted to build?
These days it's a usual practice to provide users with multiple social login methods for your website. This is something that Auth0 facilitates seamlessly. I wanted to combine this general-purpose use case with something related to developers and I thought of merging information from various sources such as Github, Stackoverflow, LinkedIn to make some sort of Pokemon cards for devs.
How did I start?
This was pretty straightforward, Auth0 has a nice quickstart which is all I needed for testing my use case. https://auth0.com/docs/quickstart/webapp/java-spring-boot/01-login. When you log in and download this sample it comes pre-configured with your client-id, secret, and domain. You would still need to configure your authorized domains and login/logout URLs which have been discussed in the guide.
In terms of social login, google-oauth2 is supported by default for your application. Let's take a look at the social login options and try to configure LinkedIn for our application.
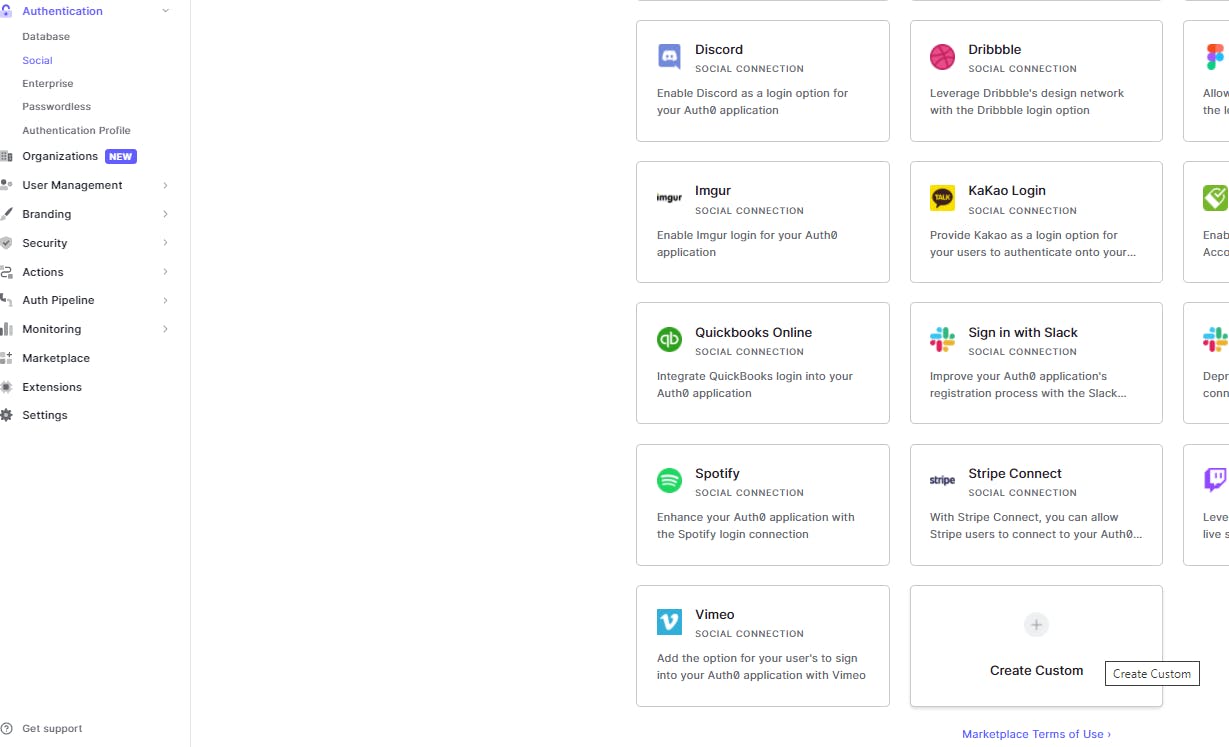
Authentication -> Social -> Create connection
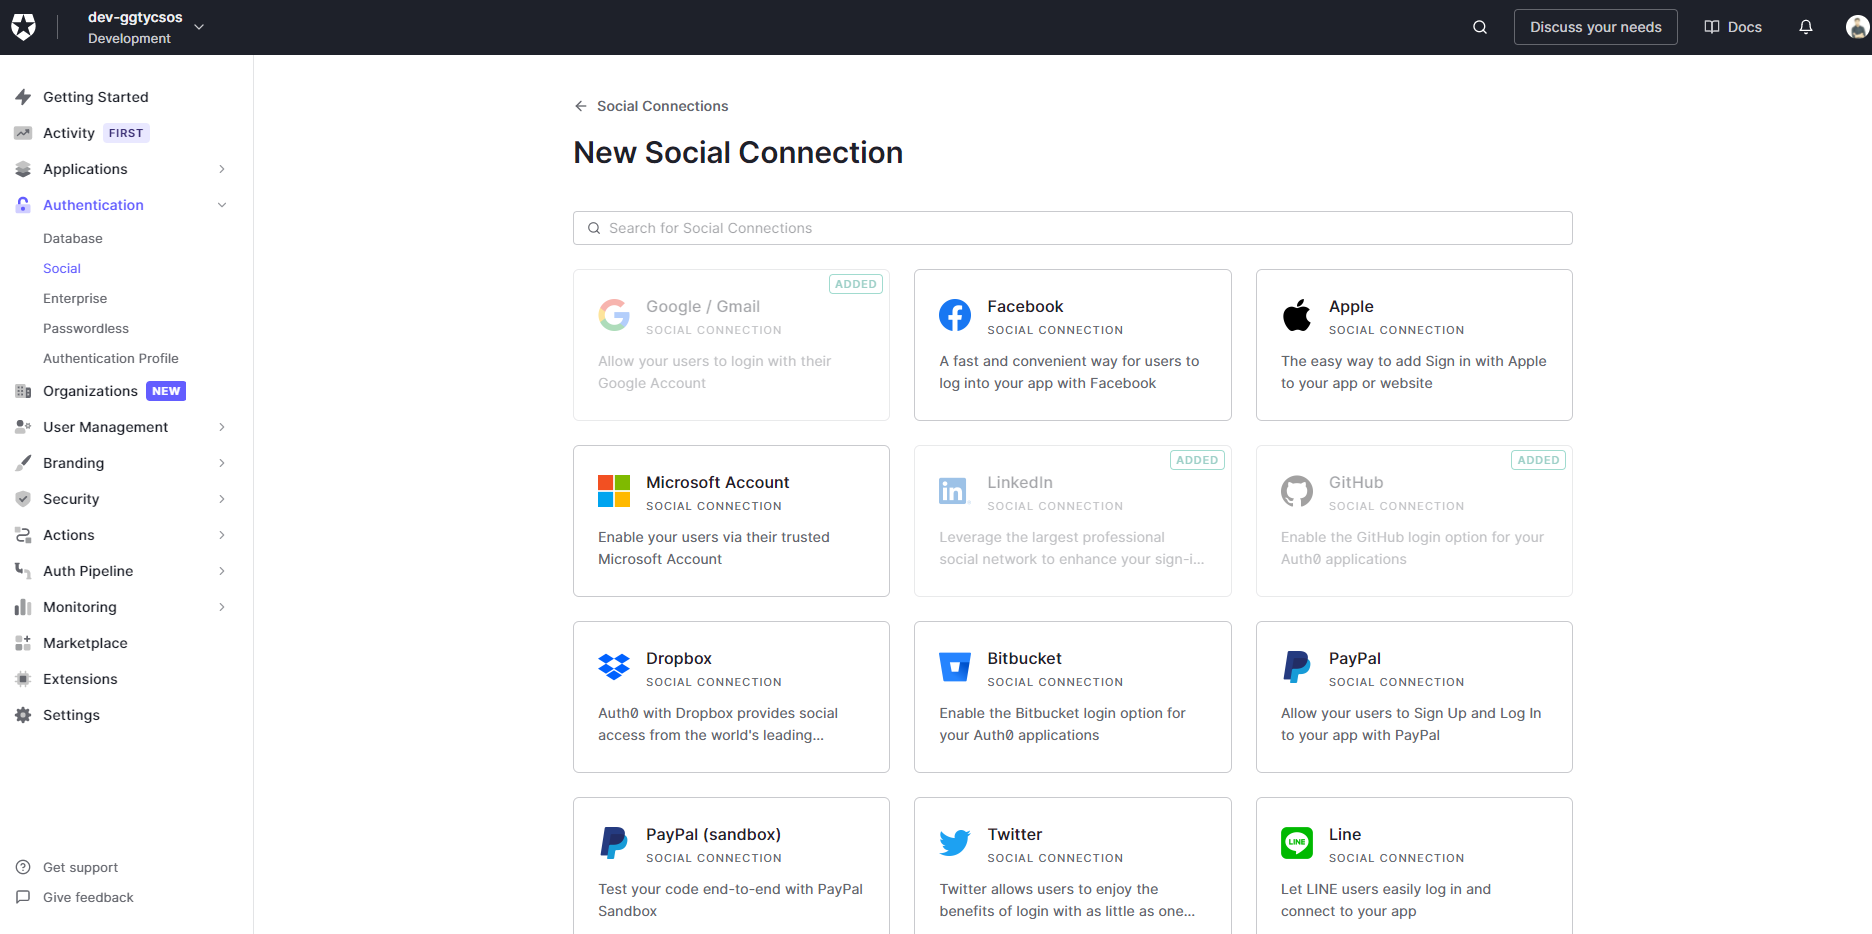
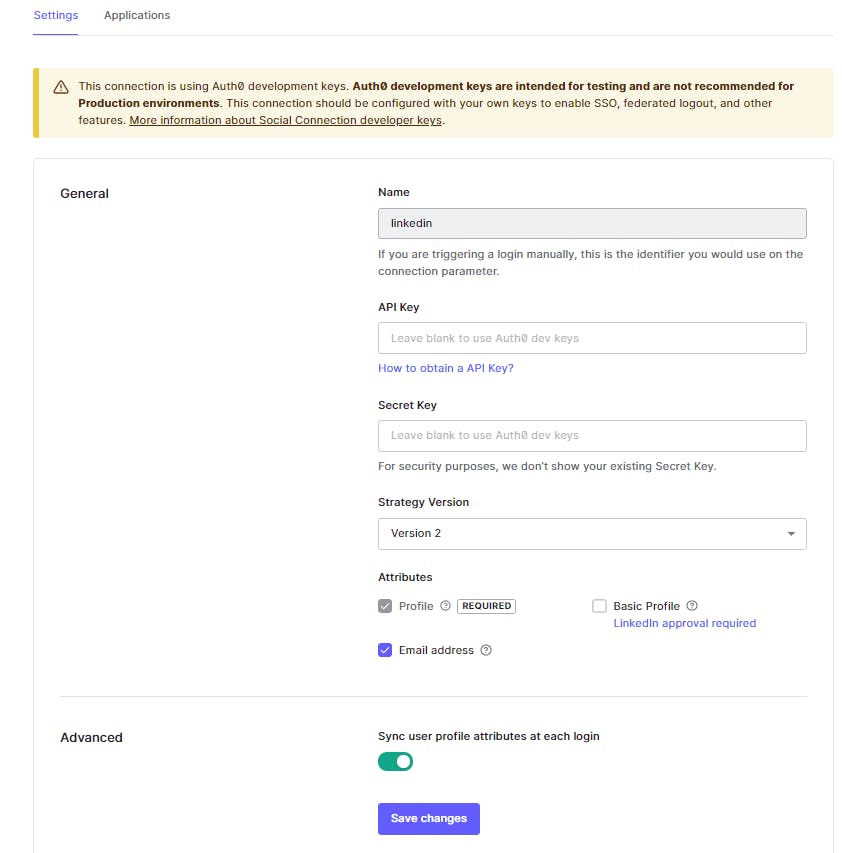
Let's add a new connection for LinkedIn and select basic profile scopes. It's kind of a task to get additional details out of LinkedIn for which you need approval from them so I didn't bother about it.
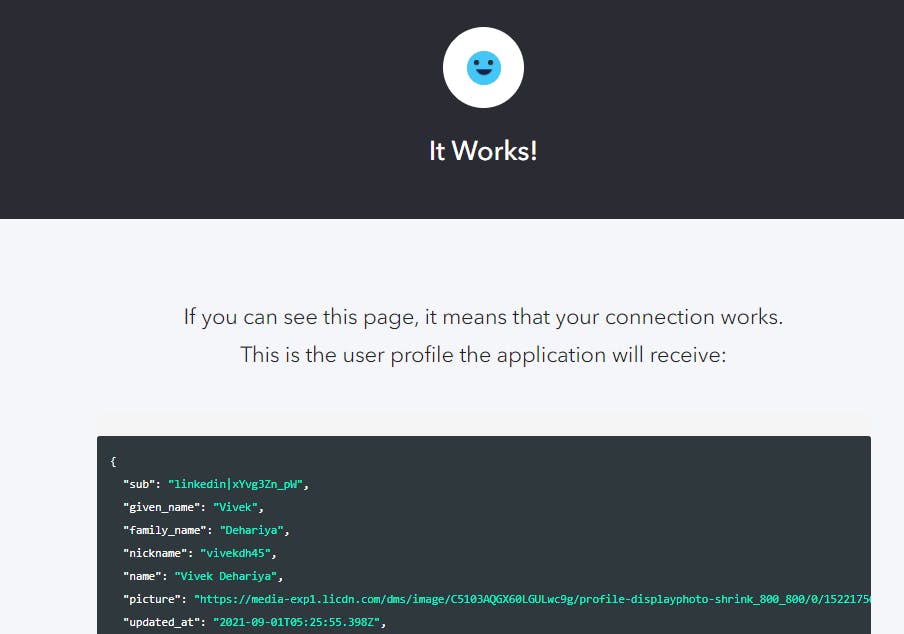
Let's quickly test out our connection with the help of the "Try Connection option available on the same page. If everything's fine you should see a successful response as such :
One thing to note here is we don't need to register our application on the LinkedIn developer portal and we can use Auth0 dev keys for our trial use case. This applies to other integrations as well. We would also need to enable this connection for the application that we created as part of the quickstart guide.
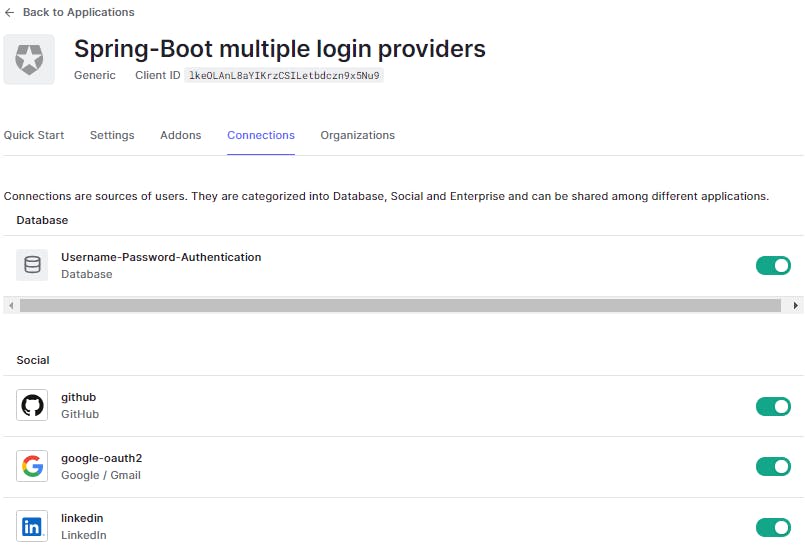
That was seamless. We know that the connection works but we are yet to test it out from our Spring Boot application. Let's hold on to that for a while as I want to integrate a few more connections. Let's go ahead and add Github as the next social login provider.
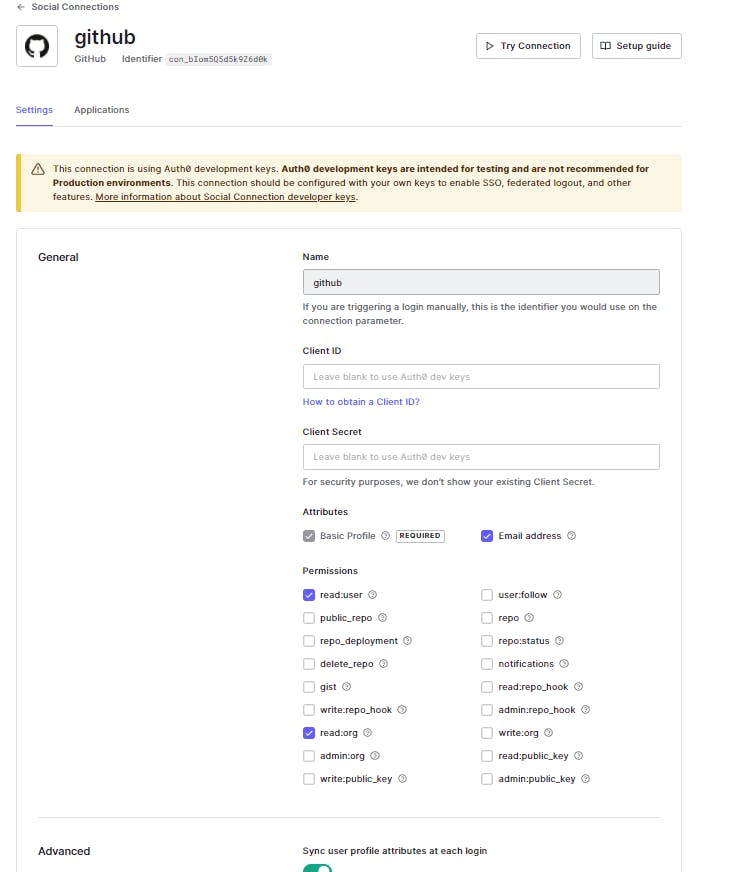
There are a couple of permissions that we can request from the user but I will go ahead with just the basic profile, email, and user read scopes. Let's test out the setup with the Try Connection option and it should lead you to a similar success page with Github related response.
What just happened?
At this point, you have successfully tested out social login connections with LinkedIn and Github and rightly so those specific users have been created for you in the Auth0 dashboard. Let's take a look.
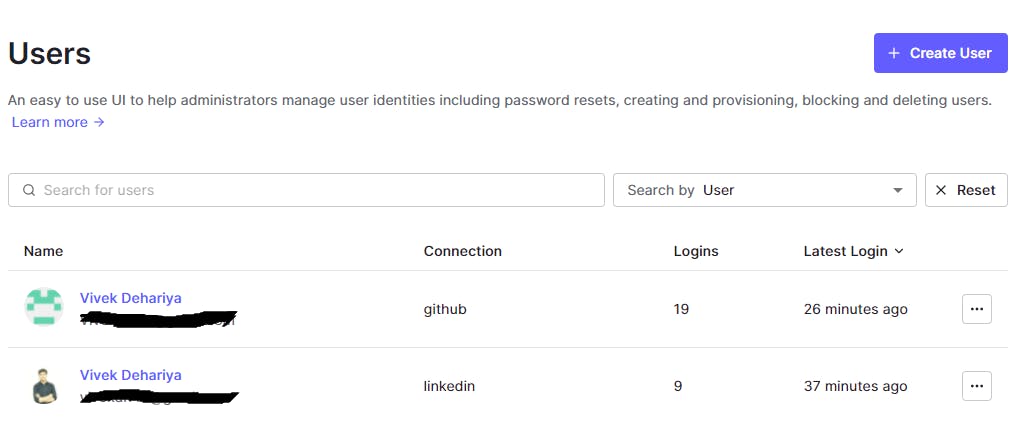
The users should have their email ids linked to the accounts if the attribute was part of the login response. Email ids are a first-class citizen here for multiple accounts linking and I will come to that later in the post. Let's take a look at the user data.
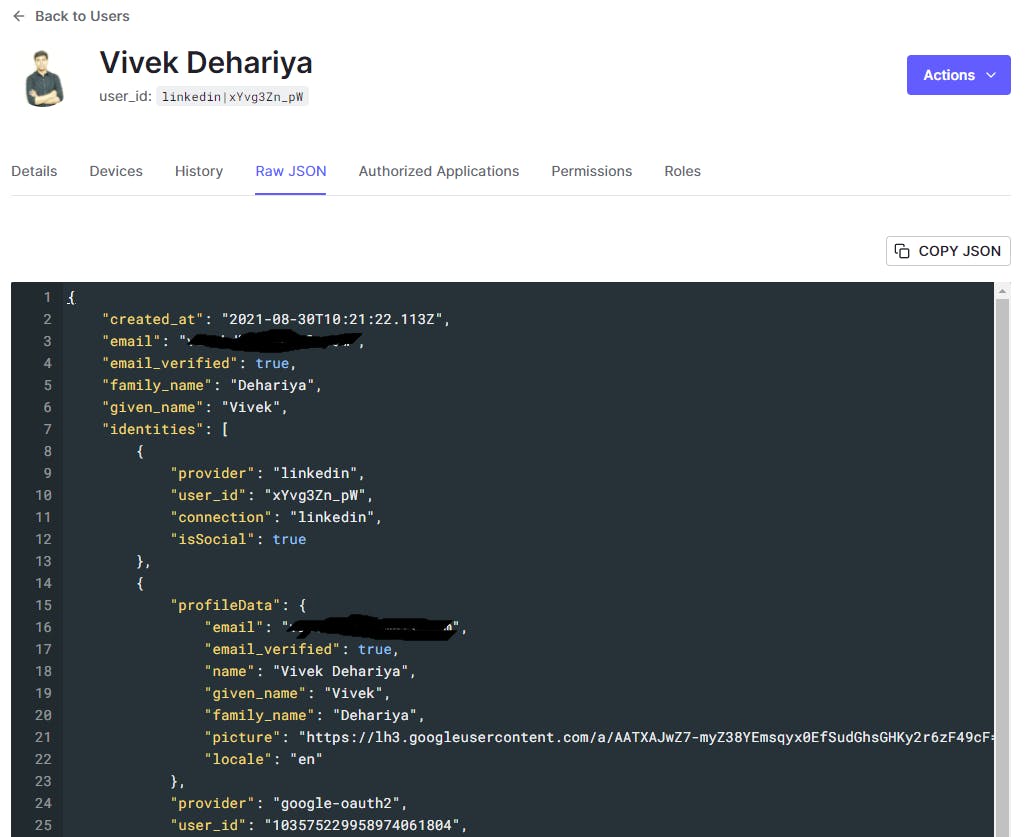
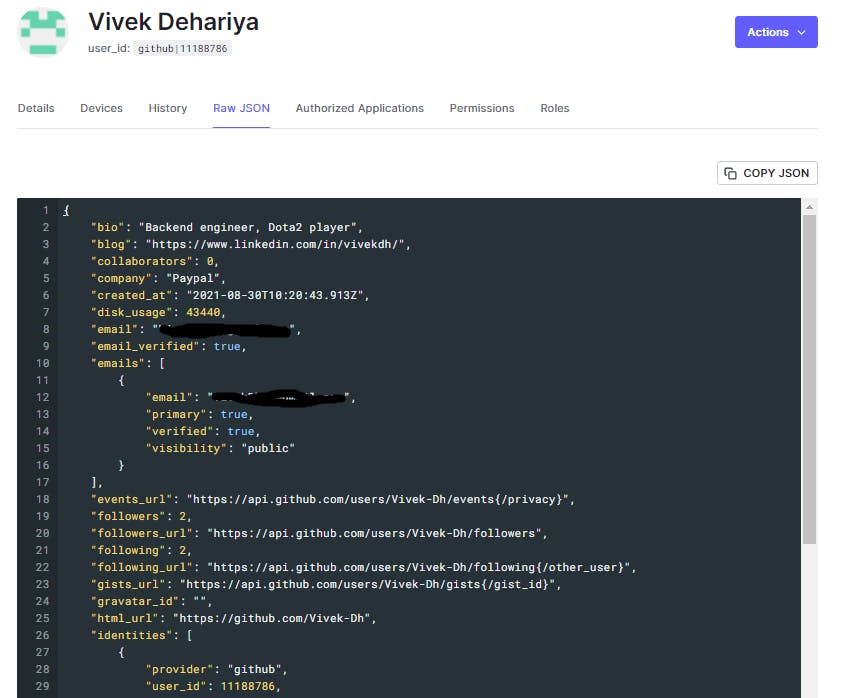
What you would probably be interested in is the complete authentication response coming from the login provider. You can see that in the Raw Json tab. Modeling the user data can be a bit tricky if you are not aware of the Auth0 strategy so let's discuss that here.
1) Auth0's normalized user profile: Auth0 has a normalized user profile structure to ensure standardization across different authentication sources. For supported social login providers, the profile would be enriched appropriately with standard attributes mapping. However, for custom authentication providers you would need to define a user profile generation strategy based on the normalized profile structure.
2) Open ID profile: This is a standard set of profile attributes that your Application would be receiving on successful authentication via Auth0. This will be resolved via the class OidcUser in your Spring Boot app. https://openid.net/specs/openid-connect-core-1_0.html#StandardClaims
3) Your app-specific custom user profile: You would have additional attributes for your user object depending upon the source such as bio, badges, no. of connections, etc. These can be accommodated via passing on custom claims along with the id token resolved on successful authentication. On Auth0's side, there are special fields in the user object namely user_metadata and app_metadata for this use case.
Let's see how the login flow looks like through the Spring Boot app. Startup the app and go to localhost:3000.
Login screen
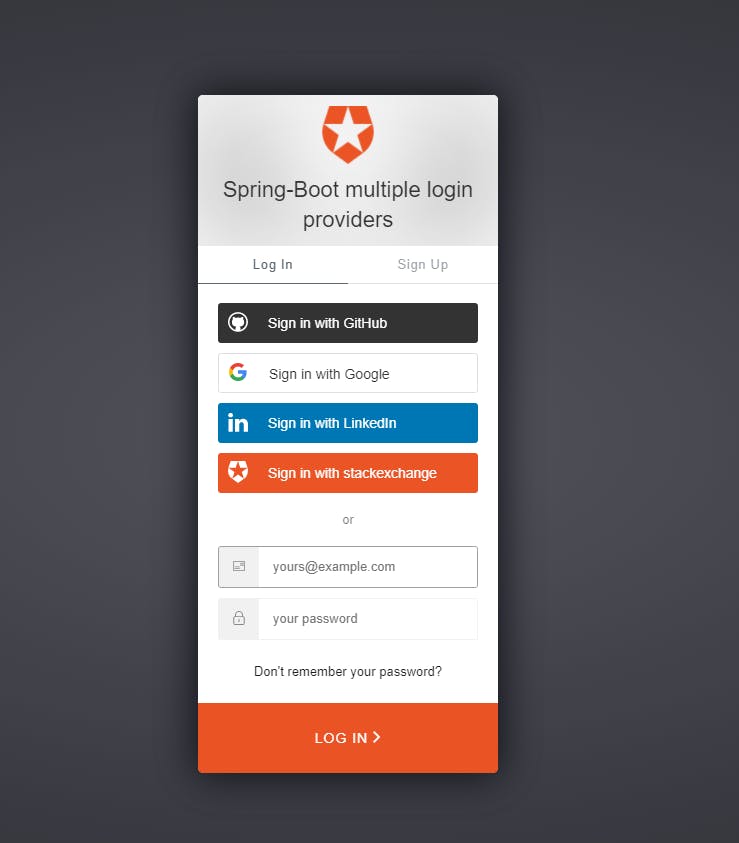
Let's login via LinkedIn and see what data do we receive in the HomeController
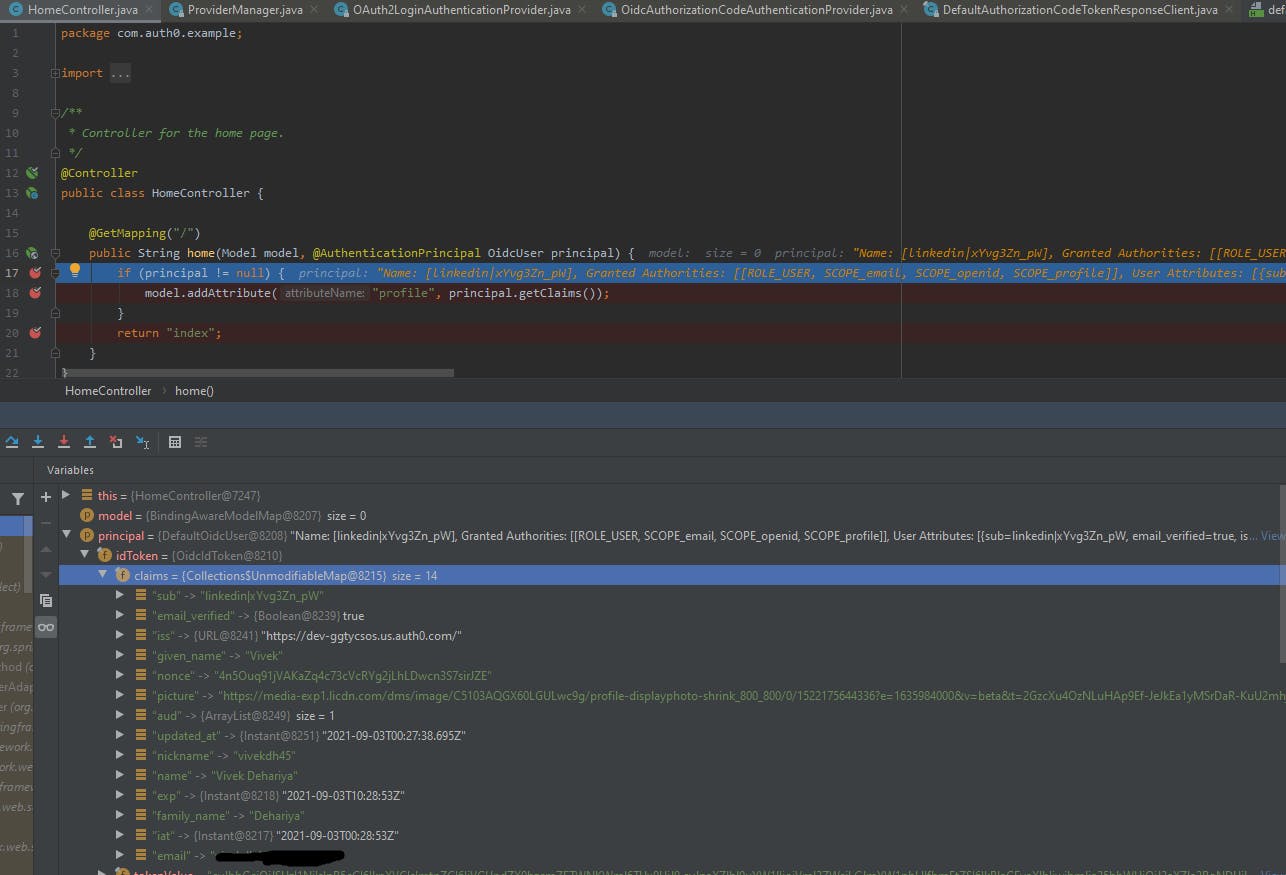
The principal object contains the OIDC standard attributes that have been resolved from the login provider i.e. LinkedIn. If you notice it doesn't have all the Auth0 normalized user profile attributes neither it will have the custom attributes present in the authentication response.
So, how do we get those? Let me introduce you to Auth0's Rules and Actions. In simple terms, these are custom javascript interceptors that can help you to modify the behavior of login flows and also enrich user profiles with custom data.
- Rules : https://auth0.com/docs/rules
- Actions : https://auth0.com/docs/actions
Actions seem to be the new way of doing this in Auth0 so let's explore it first. However, it doesn't seem to support mapping of custom login provider attributes, we can access the complete normalized user profile as part of our script though.
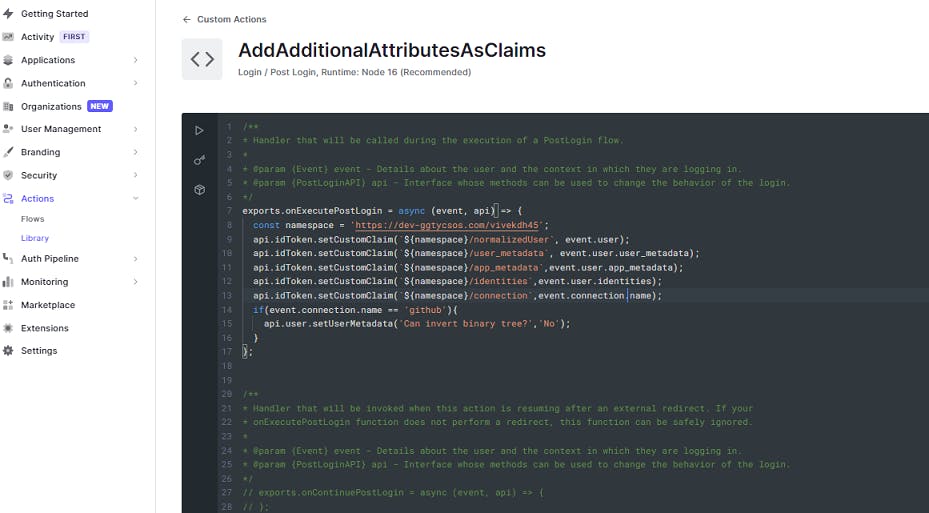
Let's create a new custom action and give it an appropriate name :
/**
* Handler that will be called during the execution of a PostLogin flow.
*
* @param {Event} event - Details about the user and the context in which they are logging in.
* @param {PostLoginAPI} api - Interface whose methods can be used to change the behavior of the login.
*/
exports.onExecutePostLogin = async (event, api) => {
  const namespace = 'https://dev-ggtycsos.com/vivekdh45';
  api.idToken.setCustomClaim(`${namespace}/normalizedUser`, event.user);
  api.idToken.setCustomClaim(`${namespace}/user_metadata`, event.user.user_metadata);
  api.idToken.setCustomClaim(`${namespace}/app_metadata`,event.user.app_metadata);
  api.idToken.setCustomClaim(`${namespace}/identities`,event.user.identities);
  api.idToken.setCustomClaim(`${namespace}/connection`,event.connection.name);
  if(event.connection.name == 'github'){
    api.user.setUserMetadata('Can invert binary tree?','No');
  }
};
To break it down, the event object contains details about the authentication response from login and the api object provides you with ways to modify the login behavior and user details.
The api object exposes the authentication idToken object, which we can now enrich with the complete normalized user profile. This is done via setting custom claims. One important thing to note here is having a namespace as part of the key that is mandatory to avoid collisions without which Auth0 will silently ignore the custom claim. We can also enrich user and app metadata over here the same way.
Save and deploy the action and off we go to configure it during the login flow.
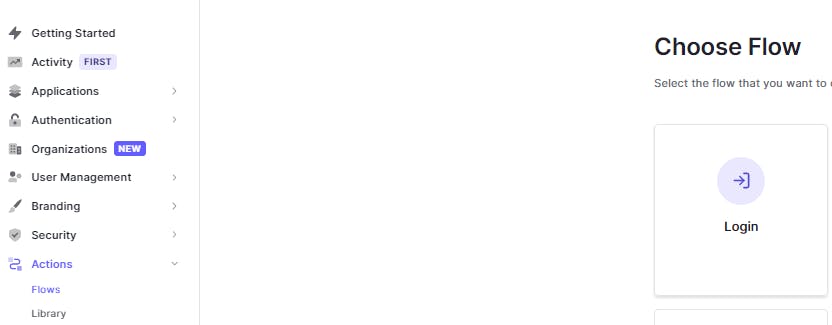
Let's select the Login flow in the Actions section and drag-and-drop our custom action from the right panel to be executed as part of the step and click on apply.
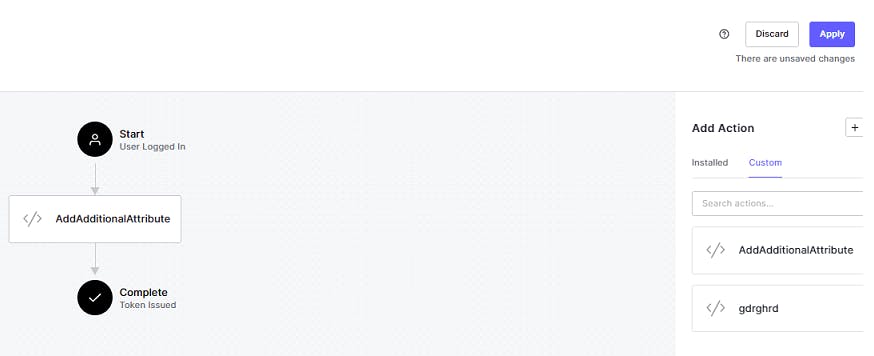
Great, now let's test it out if we can see the custom claims as part of our Principal object in our app. Let's sign in with Github this time.
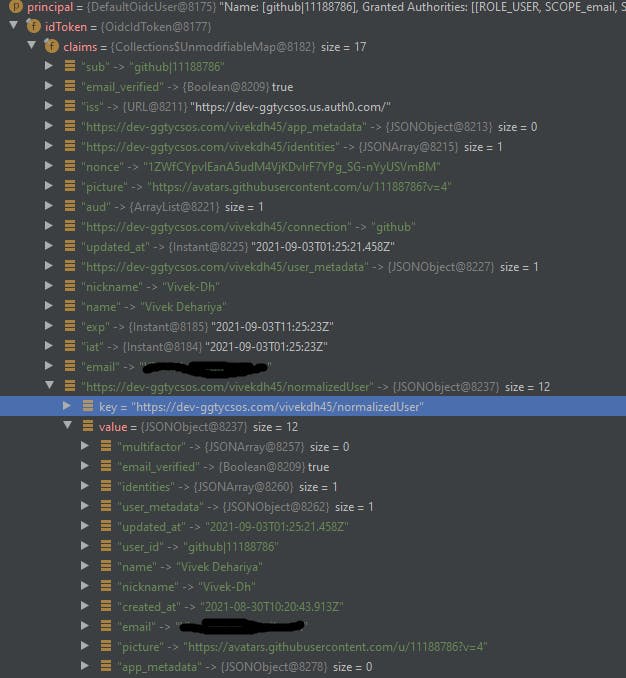
If you notice we have got extra claims in our idToken object now. We can verify that our key dev-ggtycsos.com/vivekdh45/normalizedUser does have the required data. We can check the user details in Auth0's dashboard as well. Let's check if our user metadata has been set. User Management -> Users
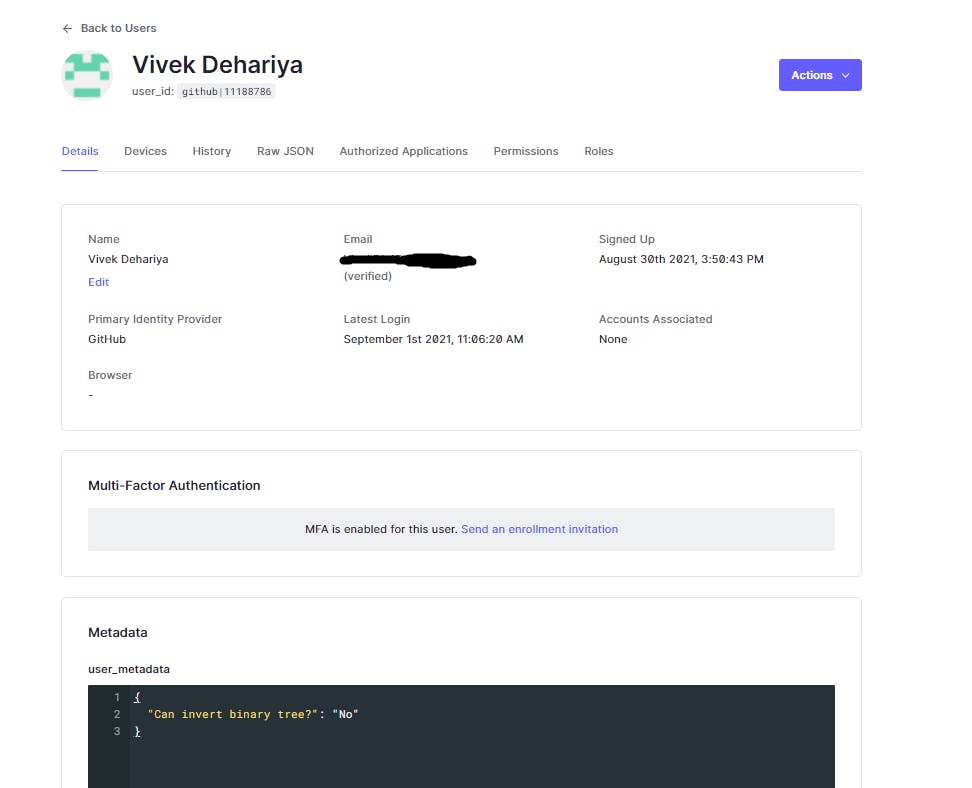
We have access to normalized user profiles now. But what about the login-provider specific custom attributes? Well, Rules have got us covered on that.
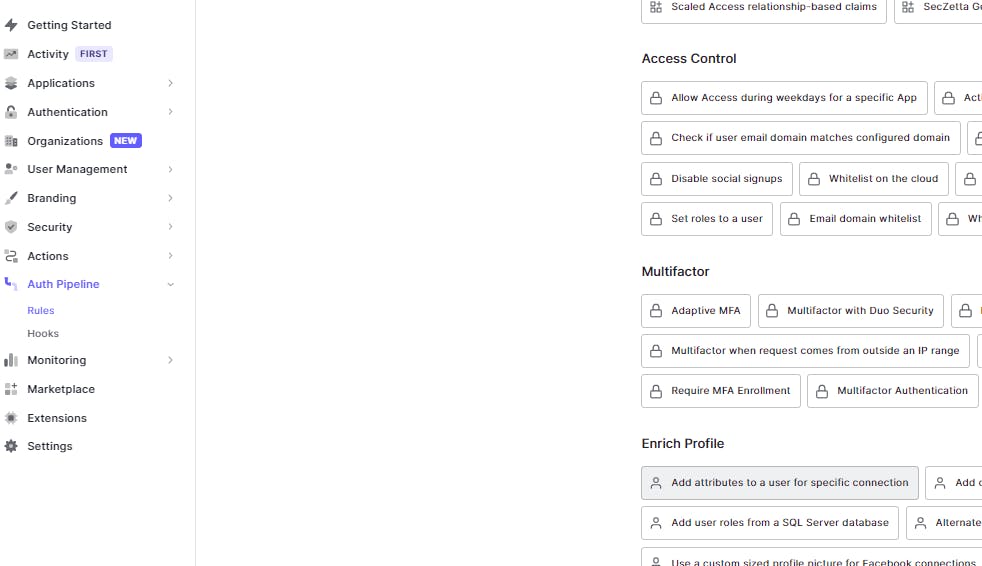
Auth Pipeline -> Rules
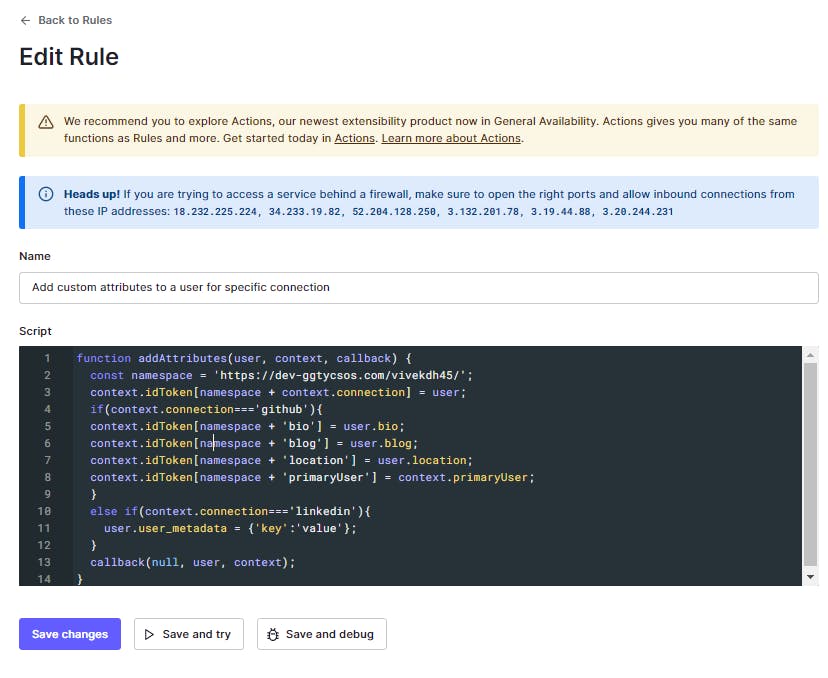
Let's create a new rule from the Enrich profile template Add attributes to a user for specific connection
function addAttributes(user, context, callback) {
  const namespace = 'https://dev-ggtycsos.com/vivekdh45/';
  context.idToken[namespace + context.connection] = user;
  if(context.connection==='github'){
    context.idToken[namespace + 'bio'] = user.bio;
  context.idToken[namespace + 'blog'] = user.blog;
  context.idToken[namespace + 'location'] = user.location;
  context.idToken[namespace + 'primaryUser'] = context.primaryUser;
  }
  callback(null, user, context);
}
The main point to notice is that the user object here maps to the complete response received from the login provider, the Raw Json, and is not the normalized user object. That gives us access to all the custom fields as part of the response. For instance, Github provides fields such as a bio, blog, and location which we can now add as custom claims in the idToken like how we did previously. The context object serves as a metadata store about the flow : https://auth0.com/docs/rules/context-object. Save the rule, make sure to enable it for your application, and proceed to test it out from the Spring Boot app.
Raw json for Github
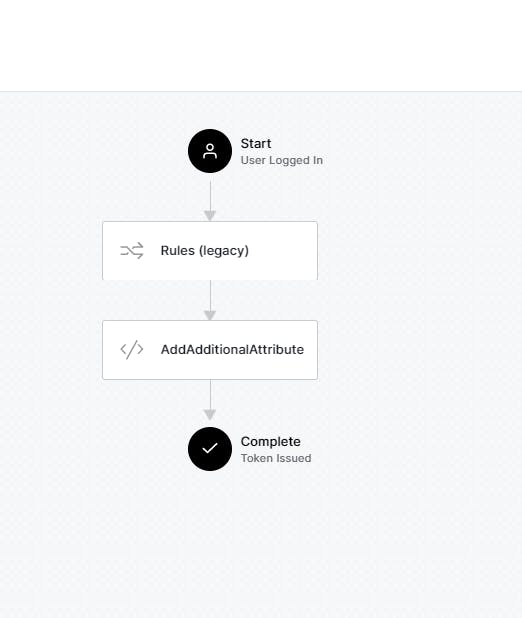
Also, Rules get executed before Actions. This is evident if we take a look at the login flow now :
Let's log in with Github again and take a look at the Principal object.
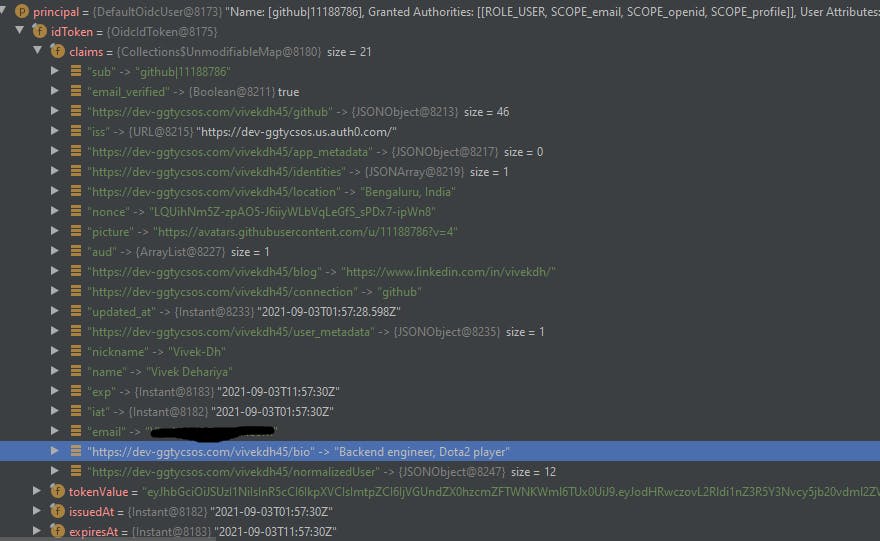
Yay! our custom attributes : bio, blog and location are indeed present.
So far so good. How about custom social logins? Let's go with integrating StackExchange login.
For this, I had to create an app on the Stackapps site and allow my Auth0 domain for incoming requests. This also generates me my client id and secret which we will need as we can't use the earlier dev keys for external integrations.
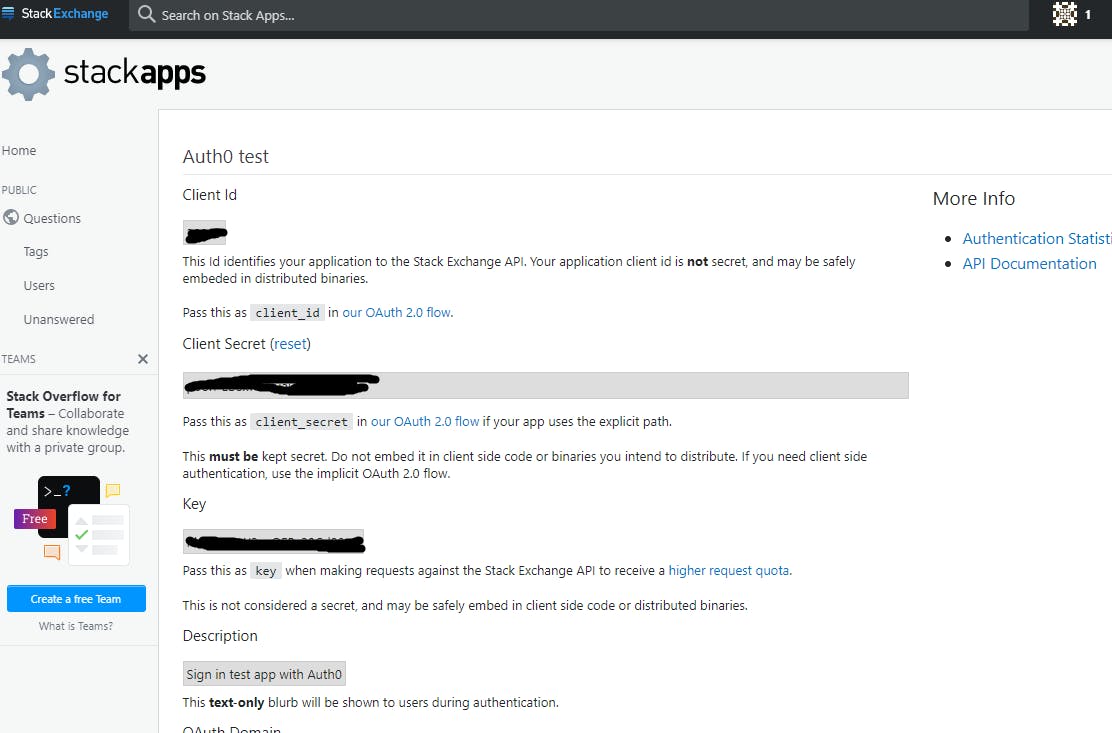
Let's create a new custom social connection in Auth0.
Authentication -> Social
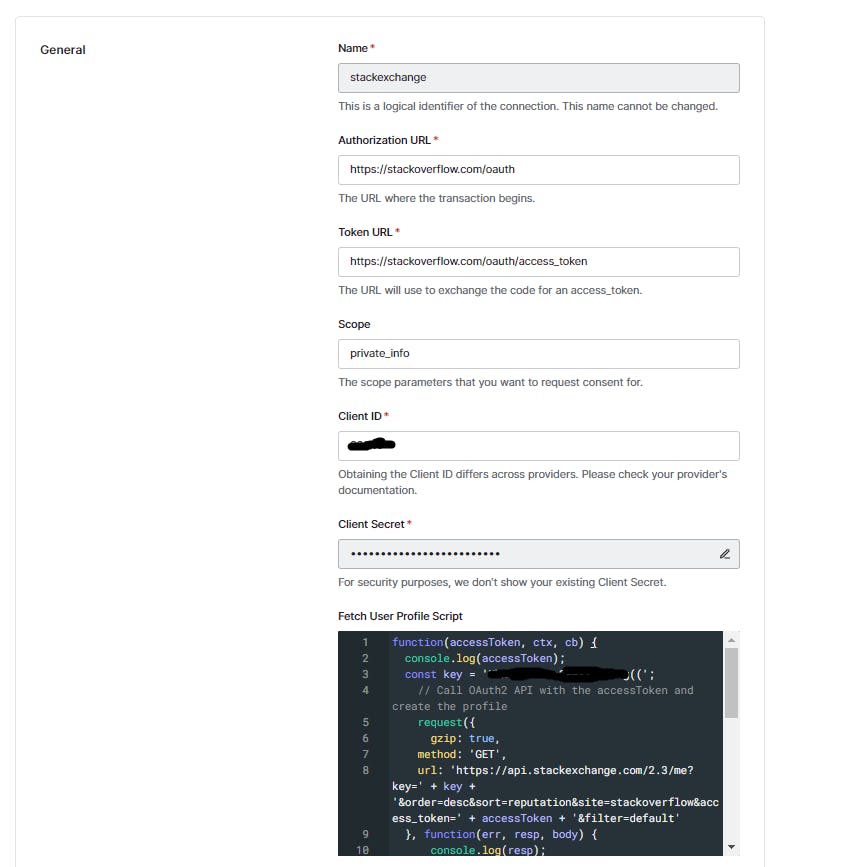
The details in this page would depend on your login provider such as client id, secret, access token URL etc. What I want to talk about is the fetch user profile script which basically connects the authentication response to Auth0 normalized user profile. Ideally, you should call the user info API here and then parse the response appropriately to Auth0 user profile structure. You will return the mapped user object from this method. Your declared rules and actions will apply as well for this custom integration.
function(accessToken, ctx, cb) {
  console.log(accessToken);
  const key = key required to call stackexchange APIs;
    // Call OAuth2 API with the accessToken and create the profile
    request({
      gzip: true,
    method: 'GET',
    url: 'https://api.stackexchange.com/2.3/me?key=' + key + '&order=desc&sort=reputation&site=stackoverflow&access_token=' + accessToken + '&filter=default'
  }, function(err, resp, body) {

      if(err) {
        return cb(err);
      }

      if(resp.statusCode !== 200) {
        return cb(new Error('StatusCode:' + resp.statusCode));
      }

      /*let profile = {
        user_id: '12377',
        given_name: 'Vivek',
        family_name: 'Dehariya',
        email: 'abc@gmail.com'
      };*/

      var profile = {
        'user_id': '1555',
        'name' : JSON.parse(body).items[0].display_name,
        'user_metadata' : JSON.parse(body).items[0]
      };
    cb(null, profile);
  });}
You can save the changes and then try the connection to make sure everything works fine. Post that you must enable it for your application like you did for LinkedIn and Github earlier.
Let's test it out from our Application.
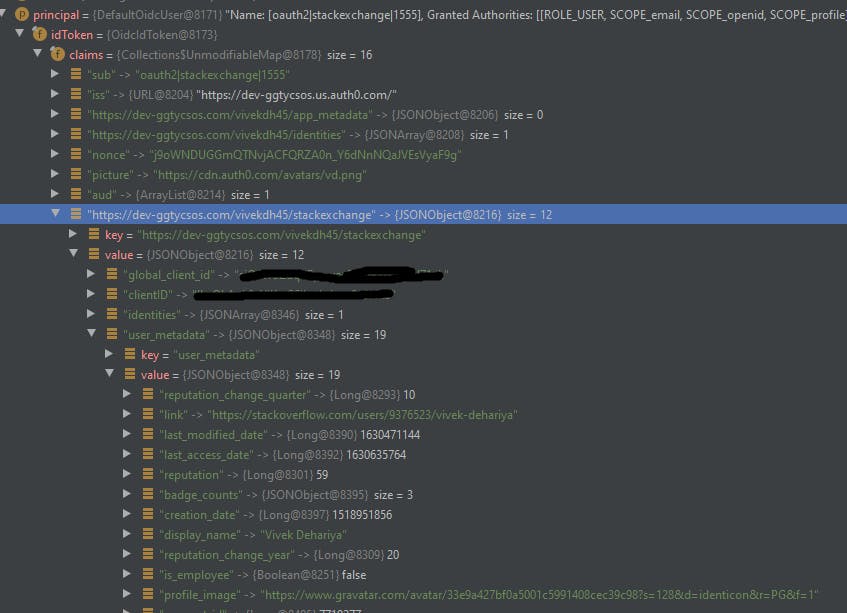
Wow, It works! I had set the complete response in the user metadata field as part of the fetch user profile script. We can verify that in the picture that I indeed have my custom attributes such as reputation and badge counts.
Time to check out my custom profile cards :
Stackoverflow
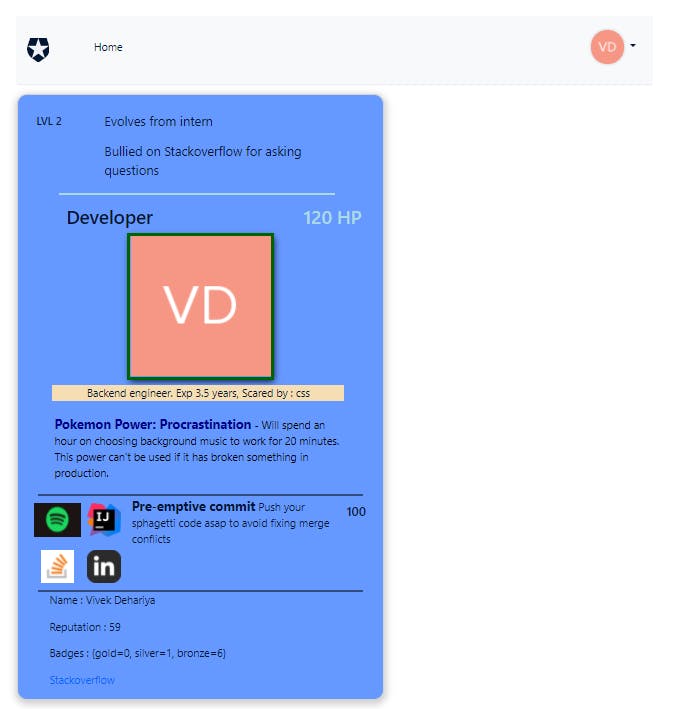
Github
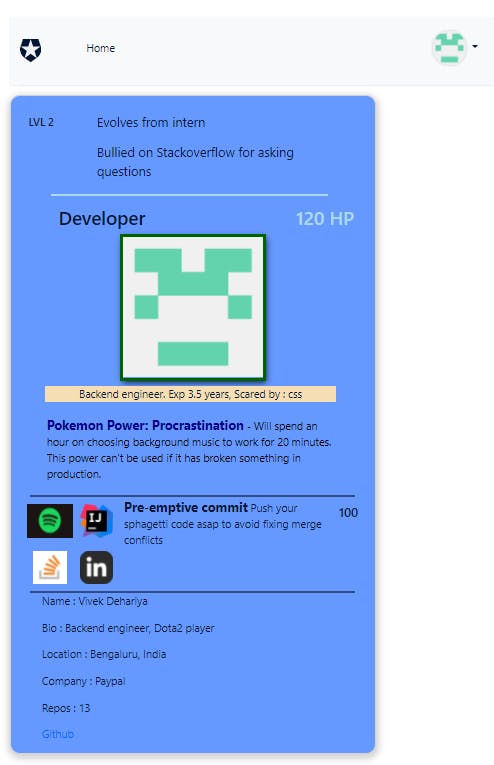
I am actually scared of HTML and CSS.
Bonus
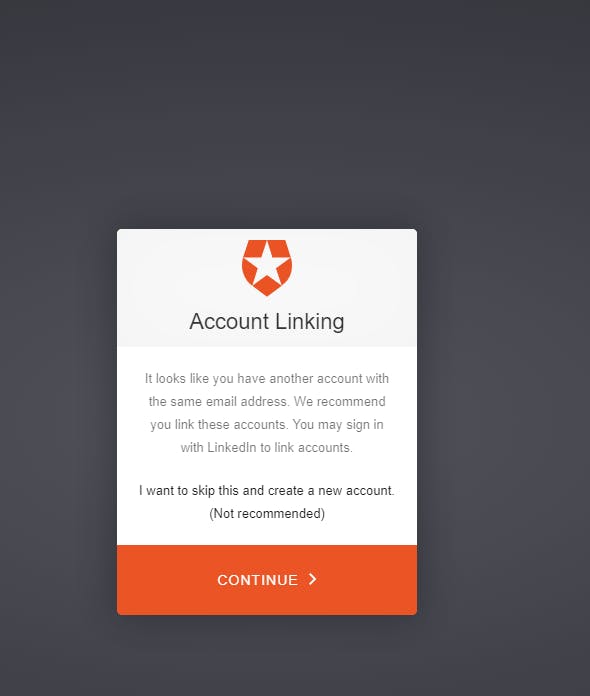
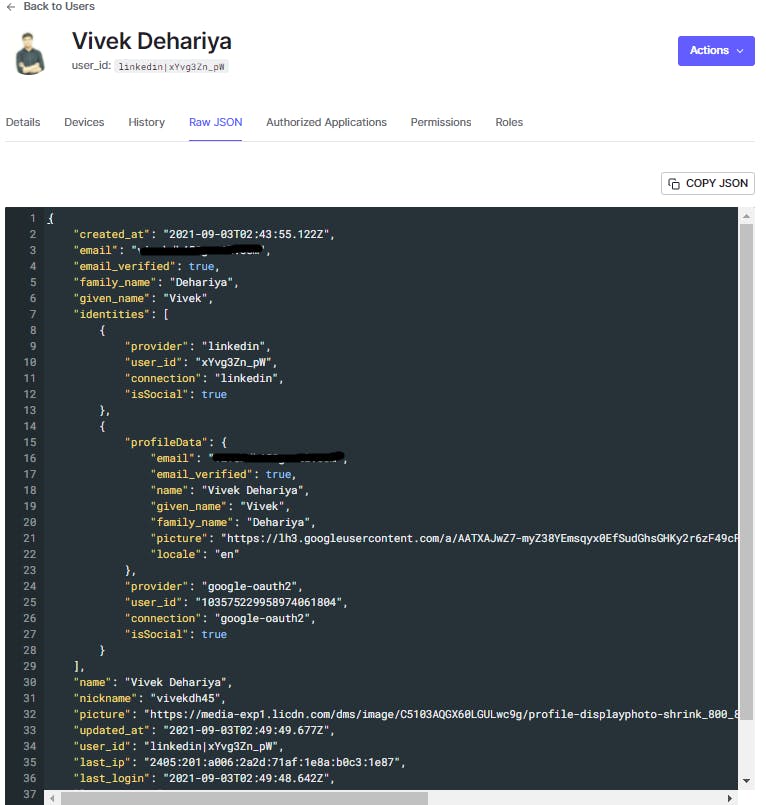
Well if you have read till here then you must have a lot of patience. Here's something cool for you. Auth0 creates individual user profiles for each of the login providers. However, from an application perspective, a single user can link multiple social accounts for their account and you should be able to capture that. Auth0 comes with a handy extension for this which will identify accounts with the same email and link them. It will reflect in the identities field of the normalized user profile. You should be having verified email as part of the authentication response and on the first login from the second and beyond connection method, the extension will prompt the user to link their accounts. Let's check how to use it.
https://auth0.com/docs/users/user-account-linking/link-user-accounts
Enable the Auth0 account link extension for your Application. You can find it in the Rules page as well.
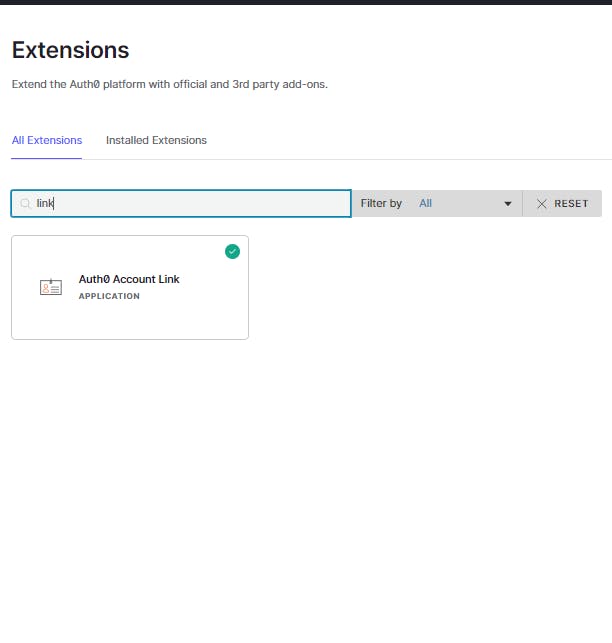
I have already logged in with LinkedIn to my application and I share the same email for my Google account as well. So, on my first login with Google account it will prompt me to link my account with the existing LinkedIn account.
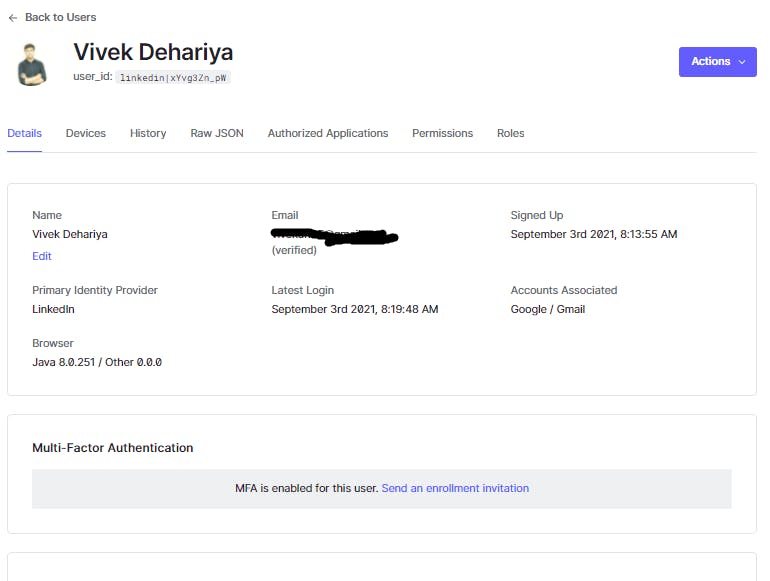
Once that is done you can check it in the Users dashboard under the Accounts Associated field. The linked data can be found in the identities field.
Whoa! That was a lot of information. But that's about it. Hope this was helpful, do let me know about it. Thanks for reading.
#Auth0 #Auth0Hackathon
![Auth0 + Spring Boot: Social login with custom authentication provider [LinkedIn, Github, StackOverflow]](https://cdn.hashnode.com/res/hashnode/image/upload/v1630637697951/ySHt2TMxQ.jpeg?w=1600&h=840&fit=crop&crop=entropy&auto=compress,format&format=webp)